Documents
SETTING UP THE SERVER
Setting Up
Setting the License Manager is very simple.
You will need before you set the License Manager up
- Website access
- Database
Open any FTP software to upload the License Manager Web files.
Once you have the FTP open select the folder or create a new folder where you want to run your License
Manager Shop System.
Upload the files contained in the folder UPLOAD to your server.
Once you have uploaded all files to your server you will need to install the database, to do this go to the install
folder from any web browser I.E( https://www.yoursite.com/lmadmin/install/ )
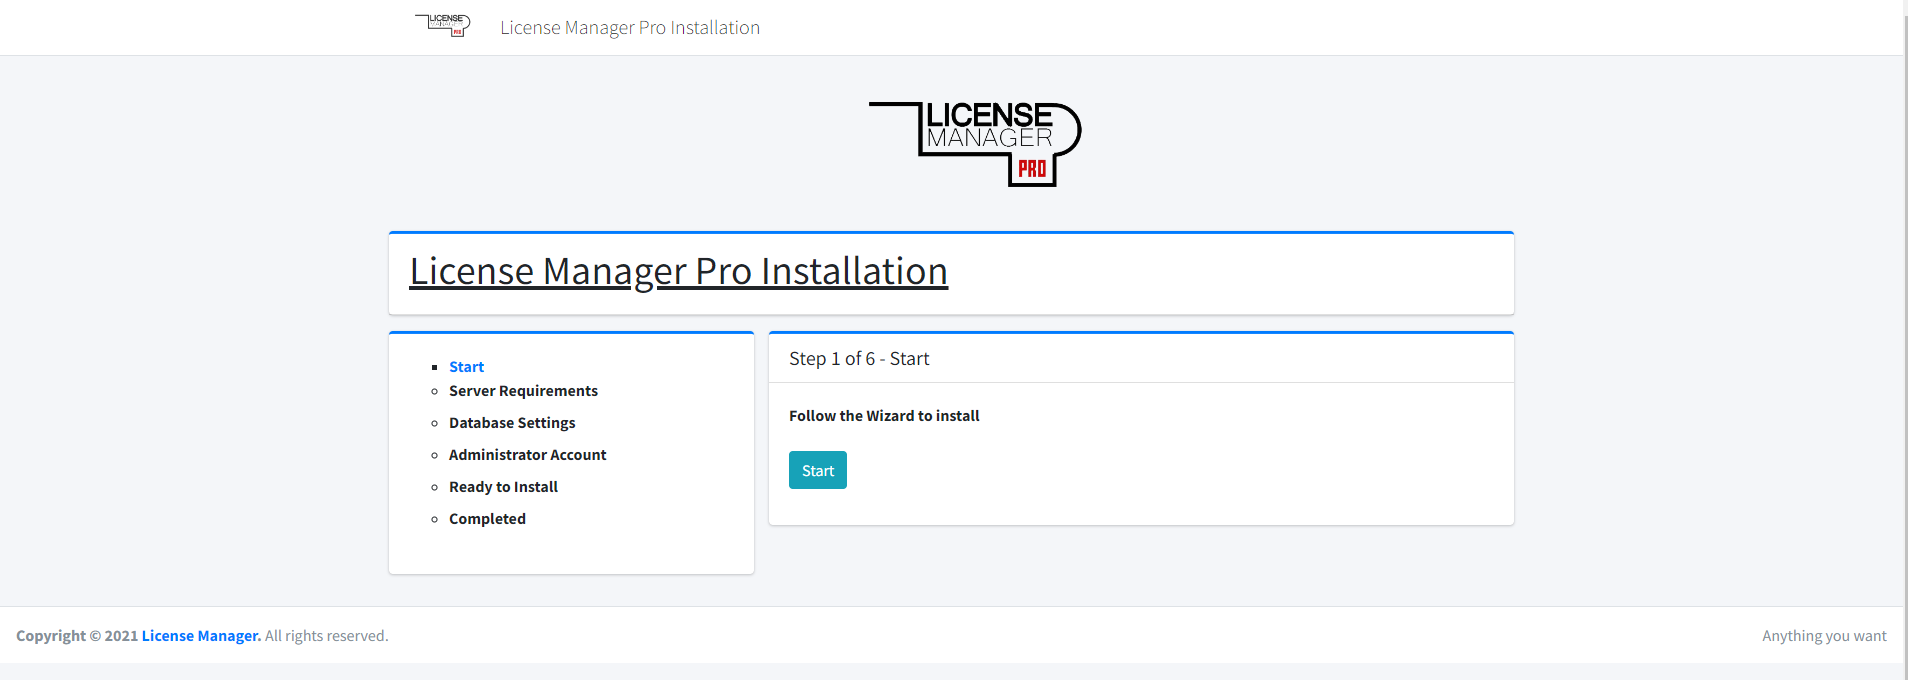
All you need to do for the install is follow the install wizard,
This will help you with all the steps required to install the database and create the config.php file.
While installing you will be able to set the admin username and password there is no default admin like in earlier
versions of the license manager.
You can take a look at the videos here
For a full list of all PDF files for the License Manager Click Here
Admin Dashboard
After you have installed the License Manager system login to your admin panel.
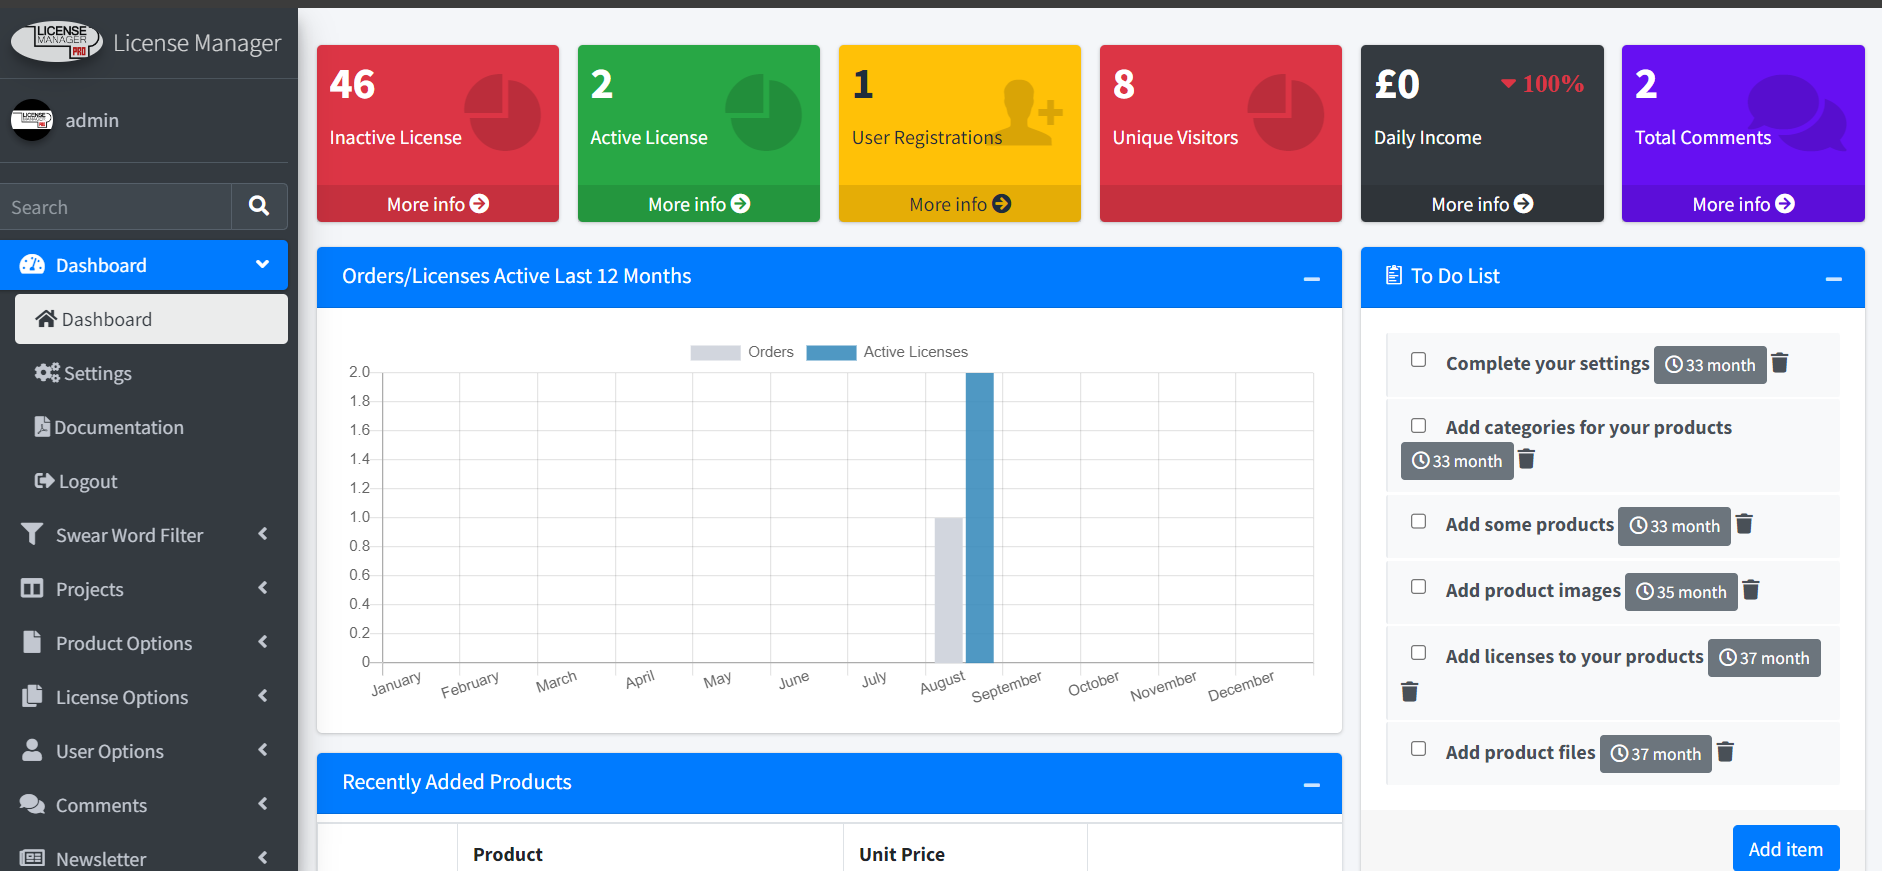
Once you have logged in you will see this page.

This is your Dashboard where you will be able to view some stats about your store.
At the top you have a few different coloured tabs lets go from left to right as to what they are.
- Inactive Licenses ( This is how many license you have that are not used at this time. )
- Active License ( This is the amount of license that are being used/sold to users )
- User Registrations ( Is the amount of users signed up to your site. )
- Unique Visitors ( Is users that have viewed your site but have not signed up )
- Total Orders ( How many orders you have had )
- Total Comments ( The amount of comments that have been added to your products. )
- Daily Income ( This is worked of the day before total sales ) New Version 2.2.3
next we look at the Orders/Licenses Active Last 12 Months
This chart shows you the last 12 months of sales and licences.
This has been changed to a bar chart for better visuals and stats.
Under that we have Admin Chat
If you have more than one admin no your site you can have chat messages here with them.
This has been moved to the side below the To Do List.
To the left top you notice the To Do List, here you can add things that you need to remember for your site,
so that you don’t forget what needs to be done.
Under that we have the Latest Members, these are the last members that have signed up to your site.
At the bottom of the page you see a Recently Added Products these are the last products you have added.
Under the Recently Added Products is a new feature for version 2.2.3 where you can get news and updates to the next version release functions and more
Setting Thing Up
Before we start you need to know if you are going to sell the licenses or make the orders up yourself.
If you are selling the licenses you will need a PayPal or Stripe account,
Go to one of these and set this up before you start.
Step 1
Login to your license manager admin page, you will see this page
This is your landing page the Admin Dashboard.
Next you see on the left all the options you have as an admin of your license manager system.
Select Settings
You will see this page with more options and more tabs.
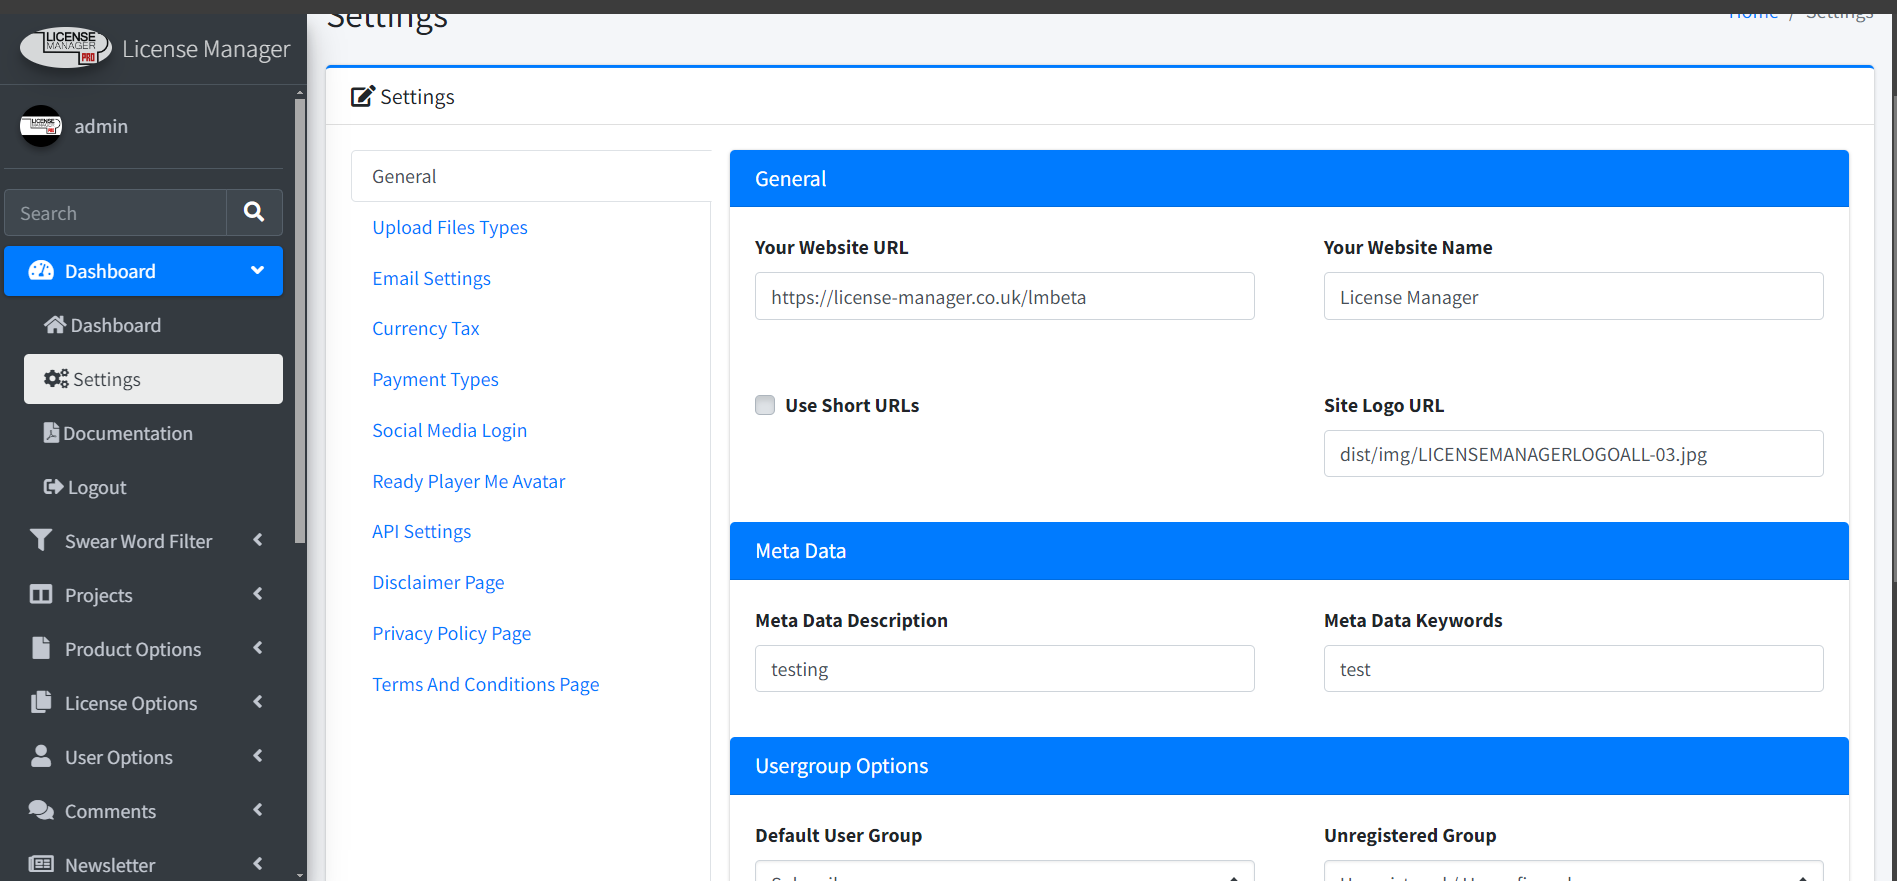
This is the General site settings here you can update your logo and much more here is a list of the General Settings
- Your Website URL
- Your Website Name
- Use Short URLs
- Site Logo URL
- Meta Data Description
- Meta Data Keywords
- Default User Group
- Unregistered Group
- Get License Manager News Updates ( New to Version 2.2.3 )
- Maintenance Mode ( New to Version 2.2.3 )
- Max Image uploads
- Upload Files Types
- Upload Image Types
- Currency Code ( USD GBP )
- Continue Shopping URL
- Cancel Return URL
- Return URL
- Use PayPal Sandbox
- Business Email
- Currency Code ( USD GBP )
- Publishable Key
- Secret Key
- Admin API Key
- User Secret Key
As you can see that the layout of the settings has now changed
Change these to your own needs for your Site.
Upload File Types
Email Settings
Within the email settings you can add your own email address where your contact us form will send messages to.
Under that you have Email Message, this is an email that will be sent to your users when they buy one of your licenses.
Under that you have the Multi-User Email Message.
This is the email that will be sent to multi-license users.

Currency Tax
You have 2 options here, the currency symbol and the tax percentage you want to add to your products.

Payment Types
You have 2 payment types to choose from PayPal and Stripe.
These are for your users to make payments to.
You can use both payment options within your shop if you wish to do so.
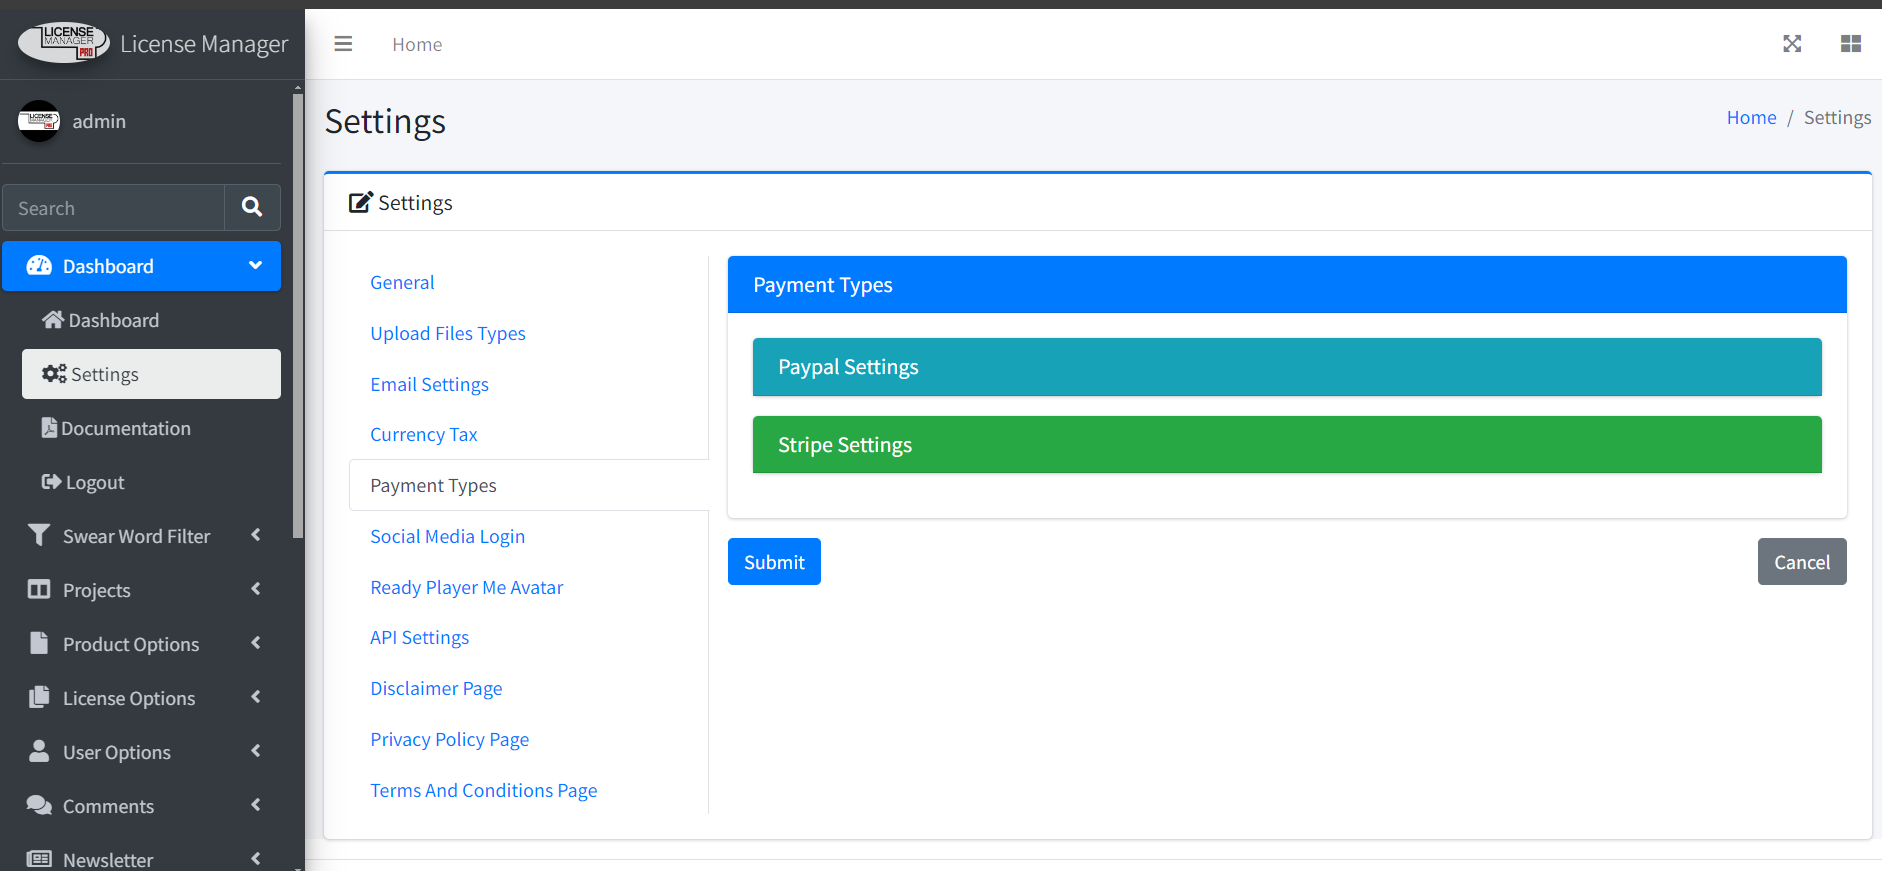
PayPal Settings
Here is a list of option you have for PayPal payments
Stripe Settings
The Stripe settings are
These settings can be found within the Stripe My Account page.
API Settings
These are the settings for the Unity License Manager Pro App not for the Lite version of license manager.
These settings connect your app/game to your license manager website to validate there license key.

Social Media Login
Here we have a new option for logging in to your site. ( New Version 2.2.3 )
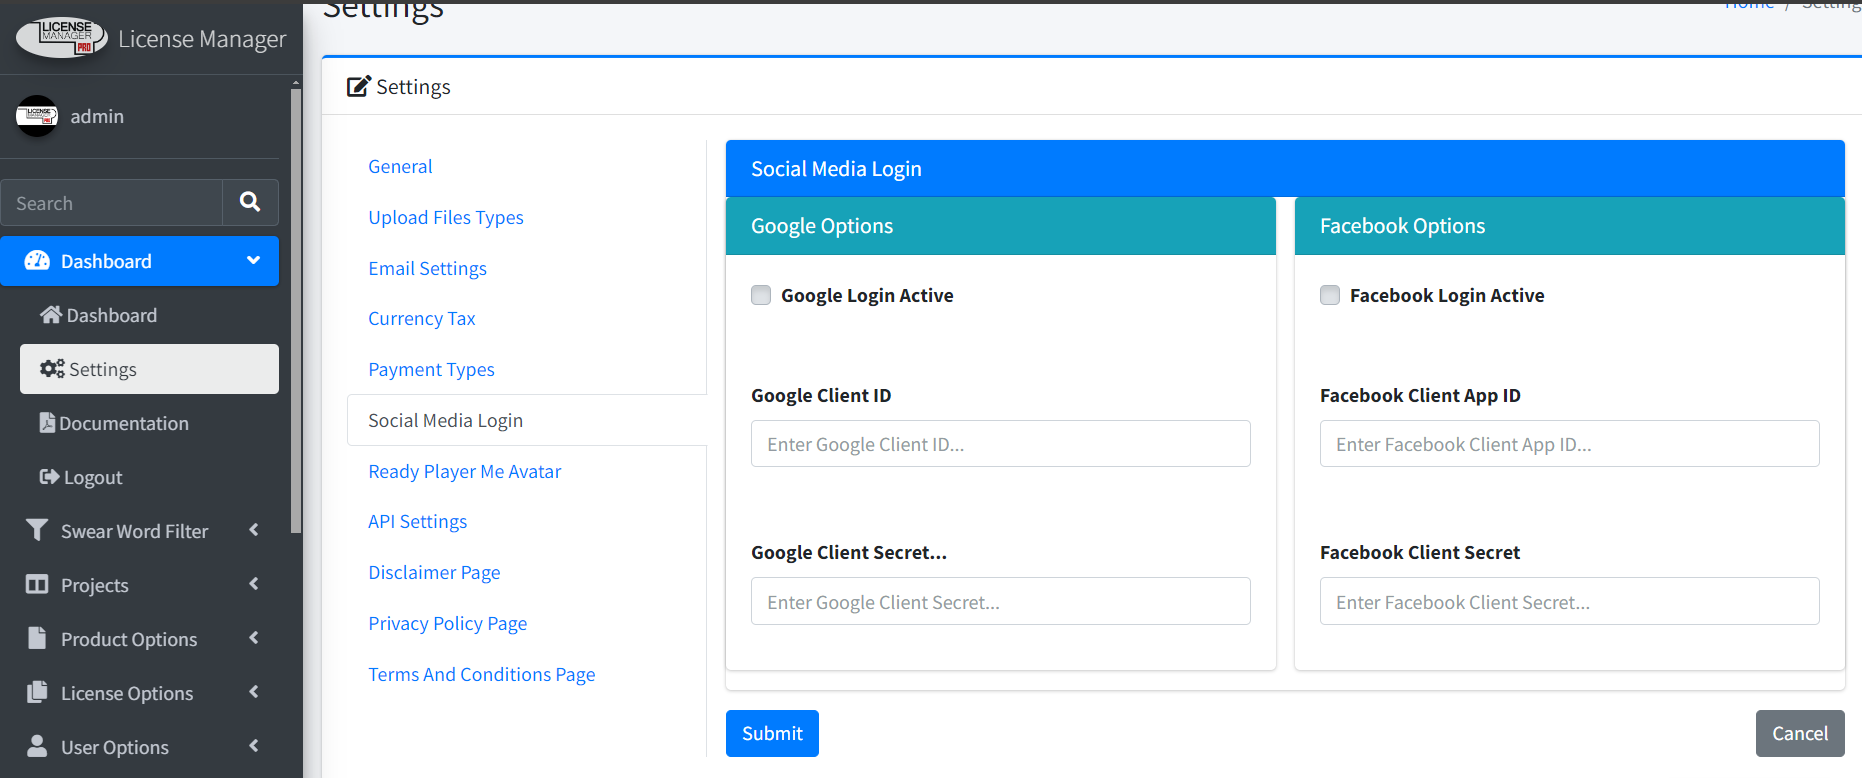
As you can see you have 2 options here to login with.
Google and Facebook.
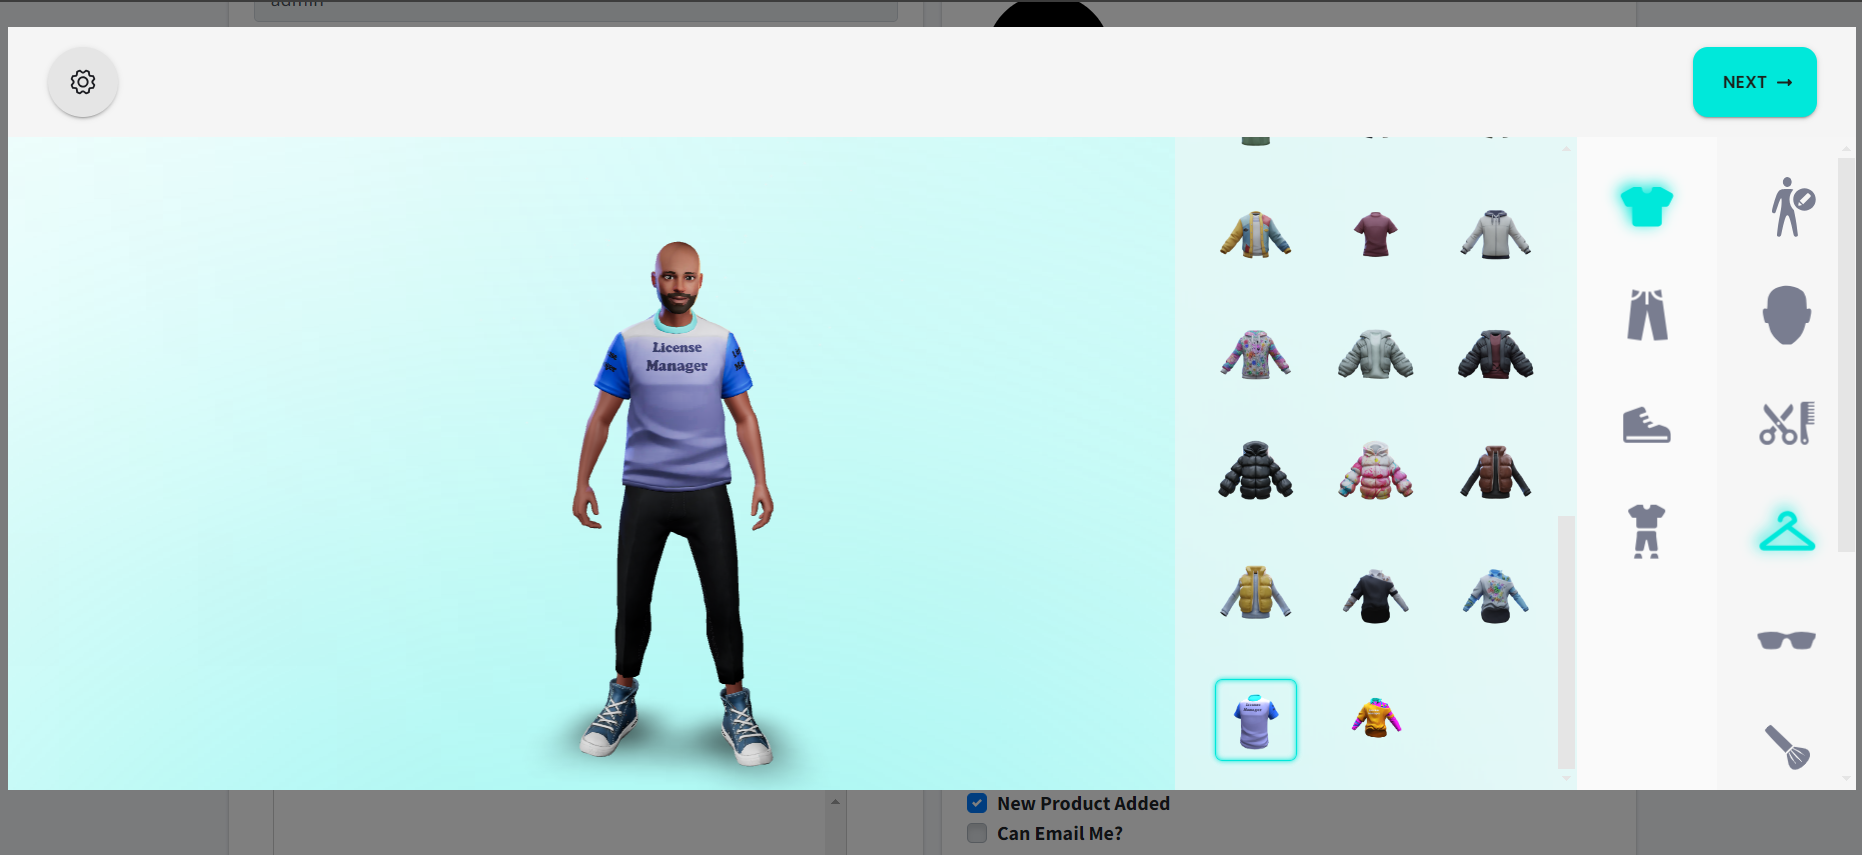
Ready Player Me
Next wit have Ready Player Me Avatar.
This will place an avatar creator on your users profile page.
This Avatar is a 3d avatar creator system as seen here
API Settings
The API settings have been moved to there own tab.
The next 3 options are self explanatory Disclaimer, Privacy Policy and Terms & Conditions

Thats all of the settings explained as to what they do and what they are for, its up to you to make these settings your own for your site store.
Swear Word Filter
Is a system to stop unwanted words from being added to your site.
These can range from swear words or words that you just dont want to see on your site.
This system will search the comments made for any of theses you have added to the Swear Word Filter and replace these with,
**** so these will not show.
You can Add, Edit or Deleted these as you please.
Adding Product Categories
Adding product categories is simple just login to your admin panel and select Product Options from the dropdown select Product Categories.
From here you will see that you dont have any categories just yet but,
We are about to add one for now.
At the top left of the page you will see the Add Item button.
Select this to add a new category, a popup will appear for you to create a category from.
Name and Description enter the values you want and click the save it button.
This has now added a new category to your site.
Adding Products
To add products to your site is easy, login to your admin panel and select the tab Product Options, from the dropdown select Create Products.
No point looking at the list as you dont have any products added yet.
When creating a product you will have these options,
- Product Name
- Category ( Look at adding categories if you dont have any yet )
- Product Description
- Product Price
- Sale Price ( if set will override Product Price and put the sale price in place showing the discount they will be getting )
- Product Active
- Use As Subscription ( If used as subscription you will have these options as well Select Subscription Type )
If you dont have any categories its best you add one now before you add any products.

To add product images login to your admin control panel.
Then select the tab on the left Product Options,
from the dropdown select list products.
From here you will see to the right there is a dropdown menu select add images from this menu.
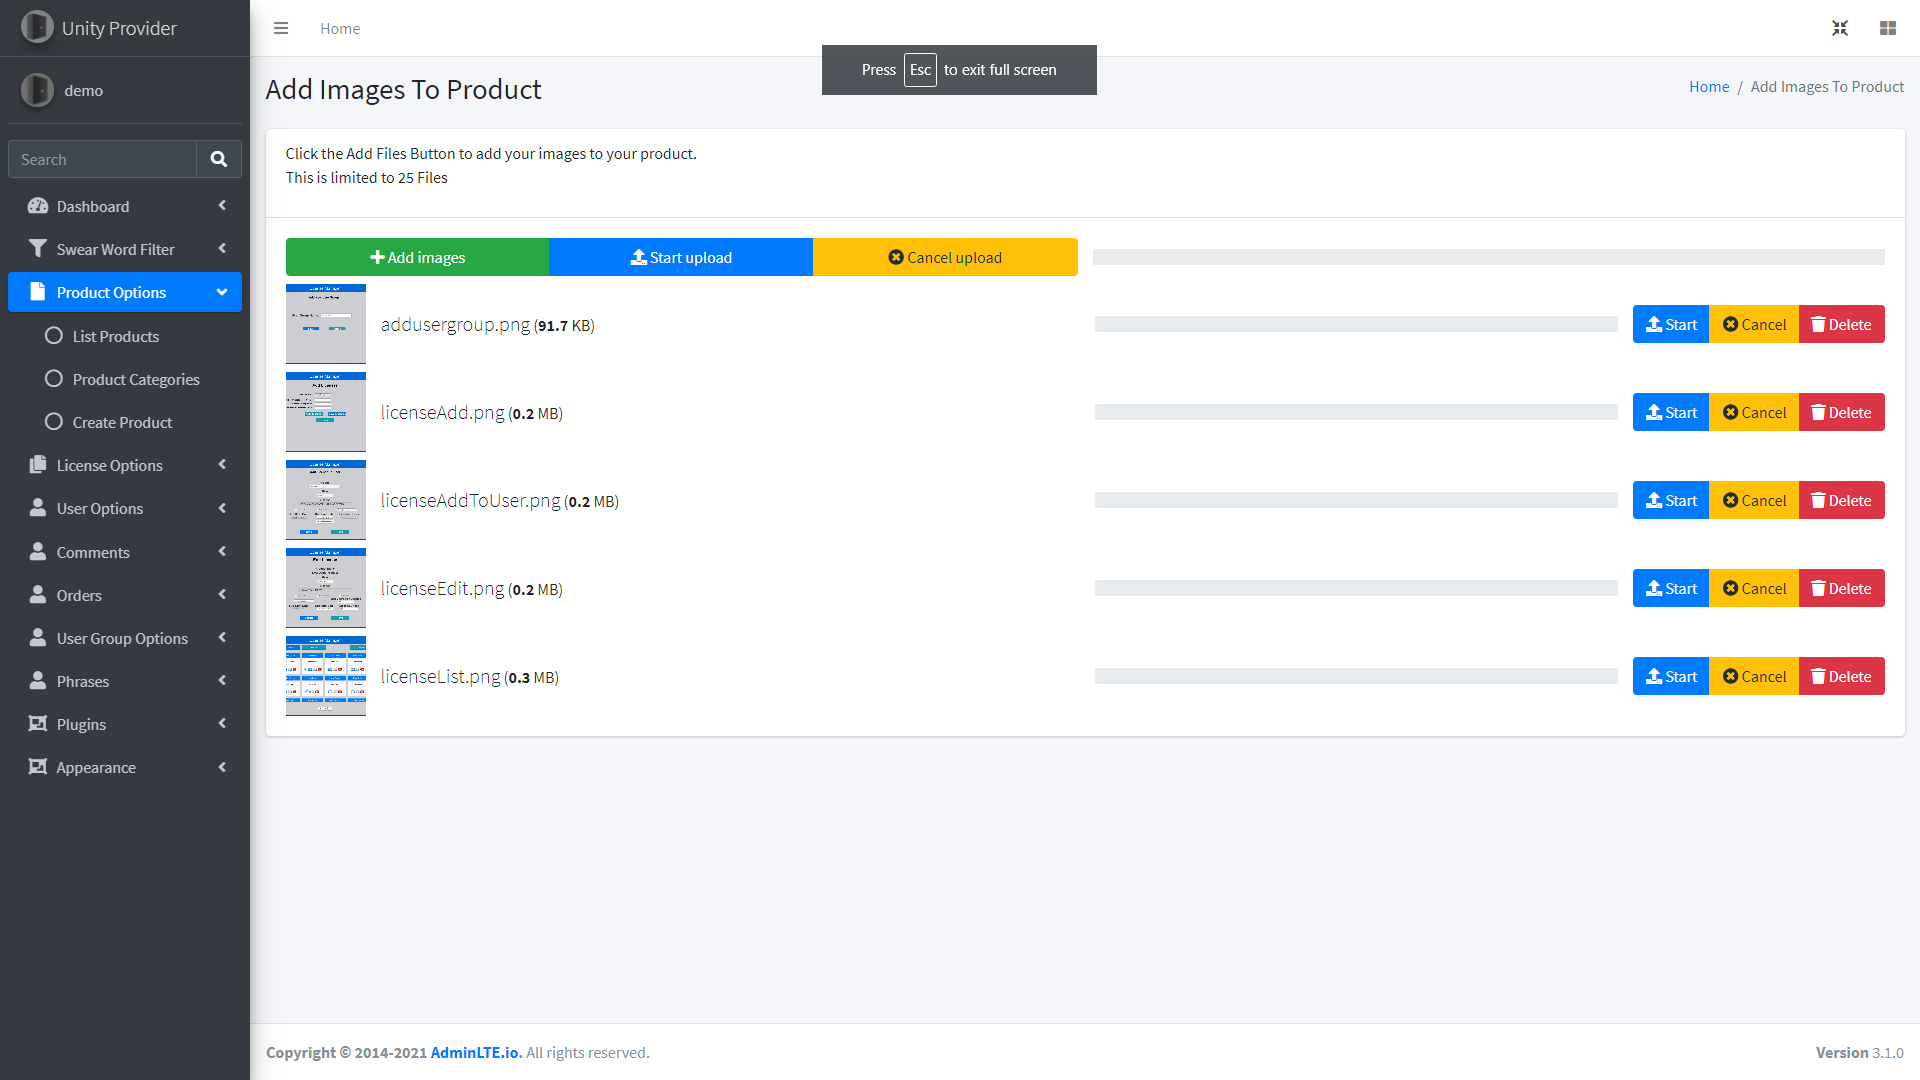
Select Add Images and add up to the max images set in the settings.
Once you have your selected images you will see the images in a list as shown above.
If these are the images you want to upload then click the button Start Upload,
this will start uploading your images to your server and adding them to your product.
Adding Product Files
Just like adding images the adding files is just as easy.
Login to your admin control panel select product options then select list products.
From the dropdown on the right next to each product select add files.
As you can see from here you can add the product name/title any version number for this file and drag and drop file or click and select file to upload.
You cannot edit files only delete them.
Adding Product Change Logs
Product change logs is just that if you have uploaded a new version of the product you can add the changes made to this version here.
These will show on the viewing of a product.
You can add, edit and deleted these as you choose.
Product Comments
Product comments are the reviews that have been left by your users along with there rating to this product.
You can edit and delete these from within the admin control panel.
License Options
Viewing license can be done in a few ways.
First you can view license from just that product by selecting product options, list products,
then from the dropdown select licenses.
This will show all licenses to that one product.
Here is what the license list will look like
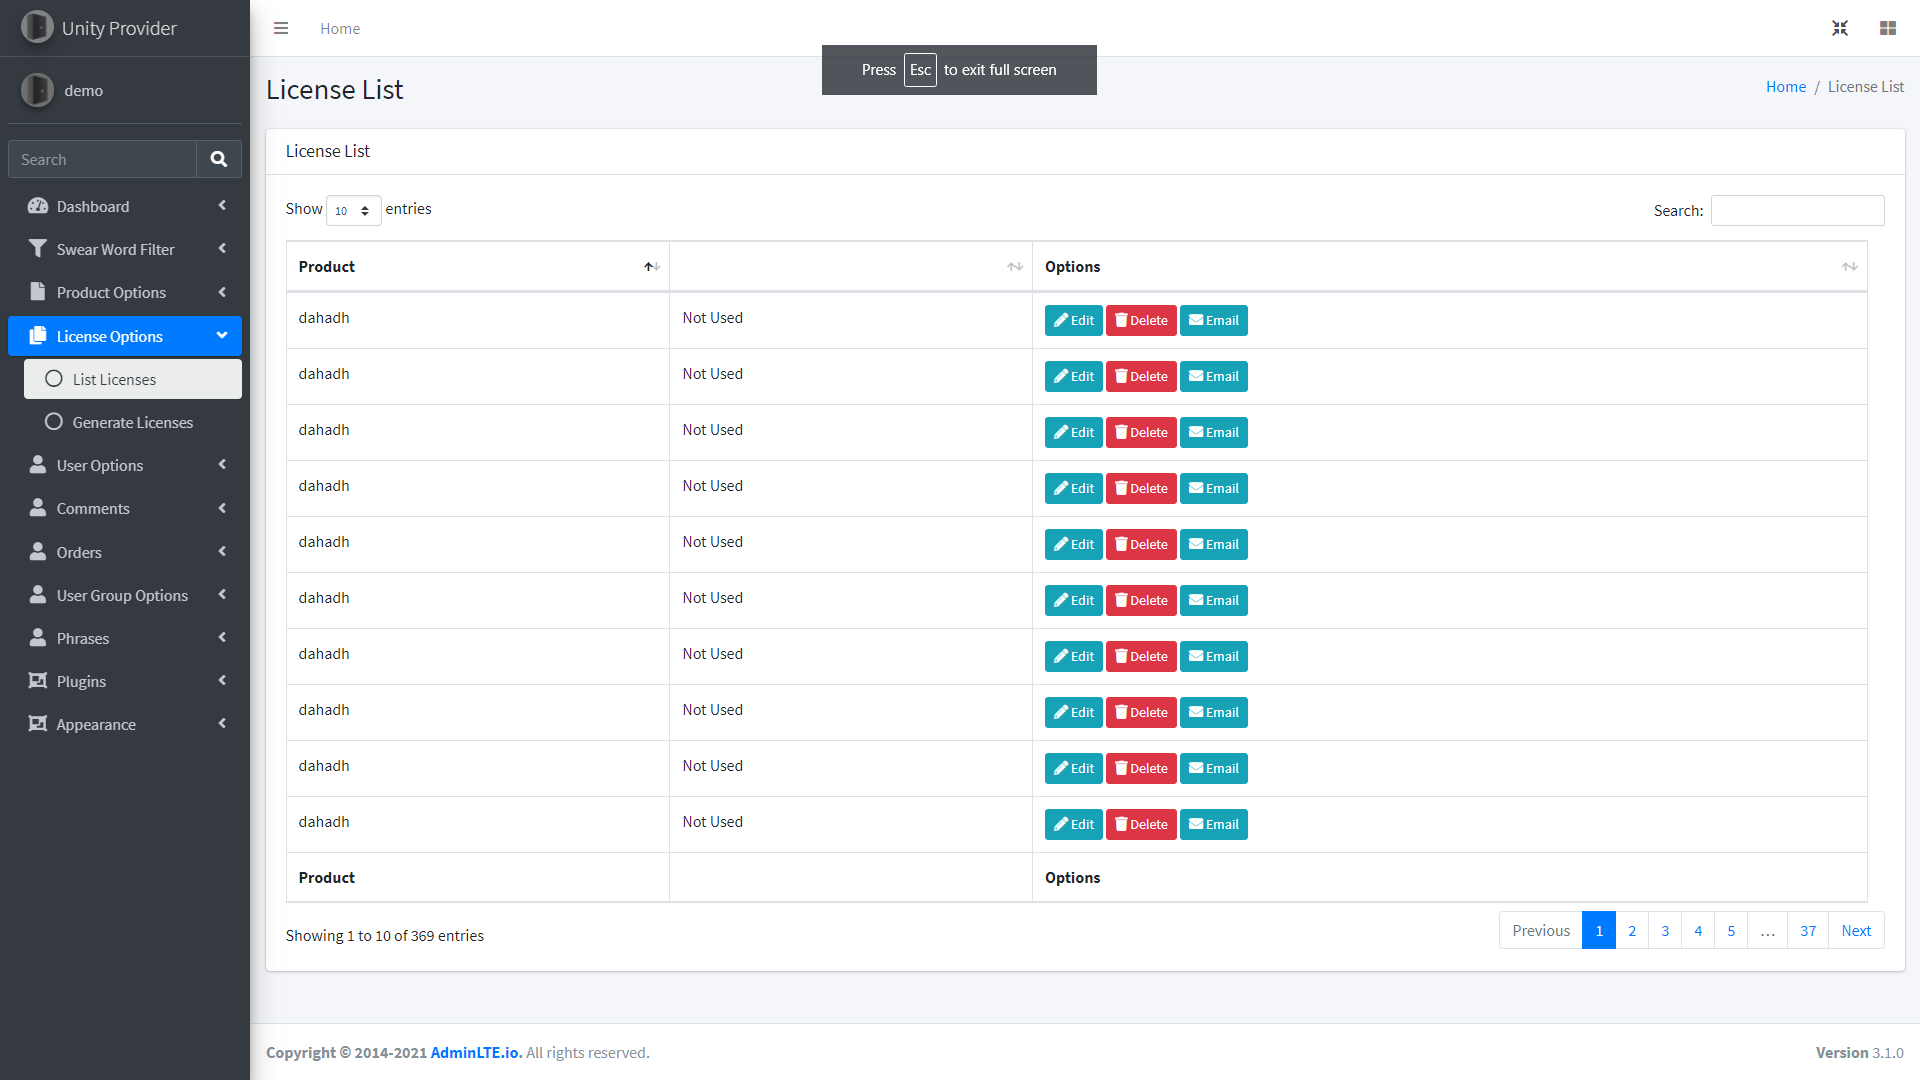
This will give you these options
<*>Product title (this is the title this license belongs to
<*>User ( this will show if the license is being used and who is using this license. )
<*>Edit
<*>Delete
<*>Multi-users ( if the license is a multi-user license this will show a list of users using this one license )
Adding More Licenses
Adding licenses to a product is as easy as i can make it for you.

Here you have 4 options for creating licenses.
<*>Select product
<*>Number of licenses to add
<*>Number of segments
<*>Number of segment chars
When the segments or segment chars are changed this will show you a preview of what the license would look like.
XXXX-XXXX-XXXX-XXXX
Editing License
Editing a license will give you these options.
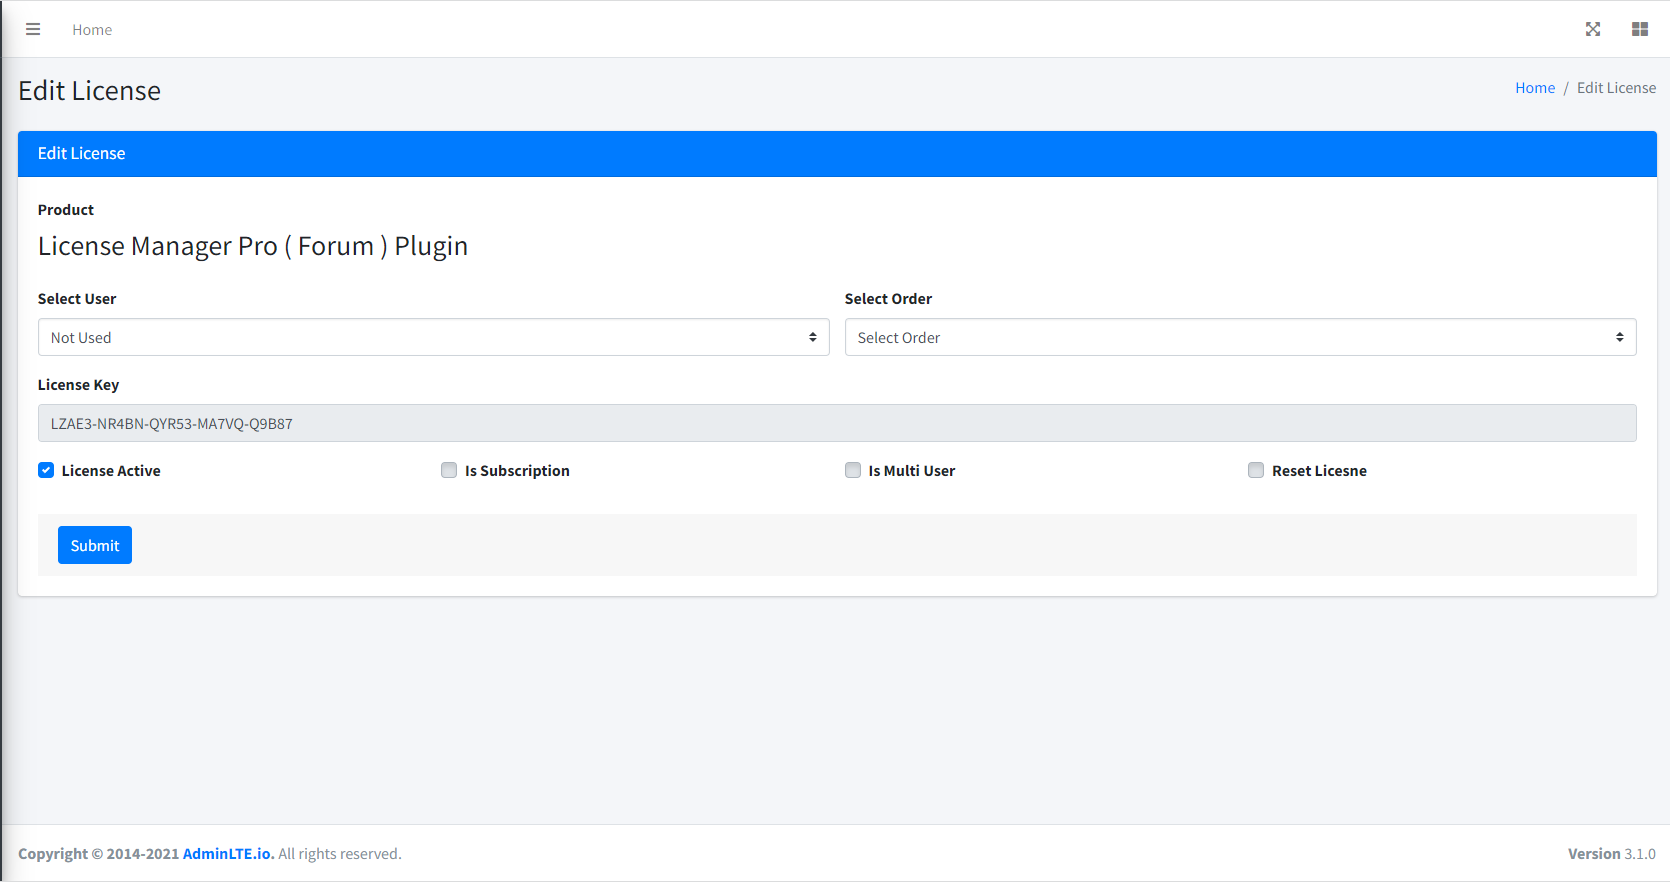
As you can see there is a few options here to update, lets go through each of these.
<*>Select User
<*>Select Order
<*>License Active
<*>Is Subscription
<*>Is Multi-User
<*>Reset License
1. Select the user you want to give this license to.
2. Select the order for this license to be added to ( This can only be done if there is an order for this user or you could be giving this license to another user. )
3. Is the license active ( if the license has been given to a user and is set to not active they would not be able to use this license till it is active )
4. Is Subscription if this license is a subscription you will see a few more options show to you once active.
You can choose the subscription type from a dropdown.
Subscription end date and license last checked, license last checked is the last time the user has checked there license do not edit this or change this it will stop the users license from working
5. Is multi-user if this is active you will see this option Max Users Per License, this is the max users aloud to use this license once the max is reached no one else will be able to use it.
6. Resetting a license, if checked this will reset the users license removing and player prefs if used within unity.
This means that once this has reset the user would have to enter in there license details again to re-activate there license.
Order Options
Order options are everything from listing to removing orders from your shop.
An order is an order placed by your users, this will show them they have x product a license or licenses within that order and if any file downloads.
With an order within the admin control panel you can
<*>List
<*>Create
<*>View
<*>Change Payment Status
<*>Delete
<*>Add License To An Order
Creating An Order
To create an order select this from your admin control panel.

As you can see from the image you need to set these options
<*>Select User
<*>Select Products
<*>Order Date
<*>Order Status
<*>License Active
<*>Is Subscription
<*>Is Multi-User
You can select multiple products to add to an order
User Options
With the user options you will be able to do the following.
<*>List Users
<*>Add
<*>Edit Delete
<*>View Licenses
<*>Add Extra Profile Options ( Only for version 2.1.2 )
Listing users

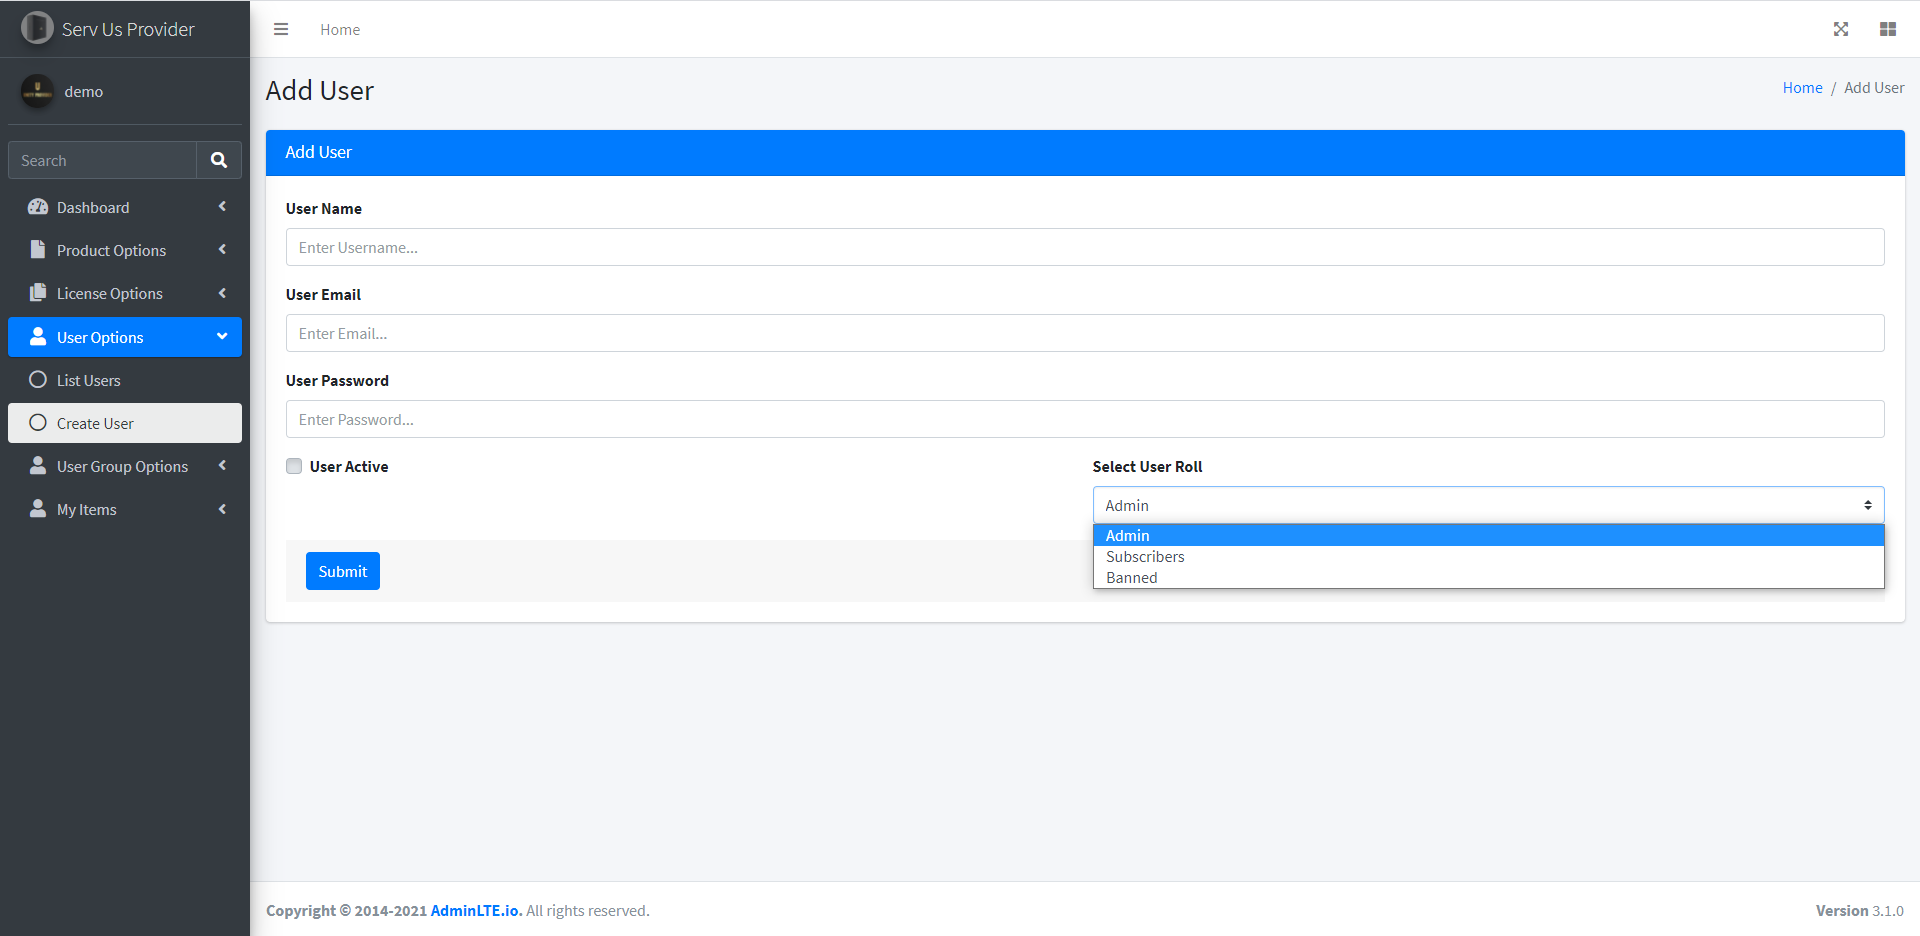
Adding/Editing Users
Extra Profile Options
The extra profile options will show on the users profile page where they will be able to edit these that you have added.
You can add
<*>Text ( input field )
<*>Text Area
<*>Checkbox
User Group Options
This is the user groups you have on your site.
Each group has its own permissions so that you can limit what they can do within your site.
To understand the permissions part select the link to the left Group Permissions.
With the user groups you can list, edit, create and remove these.
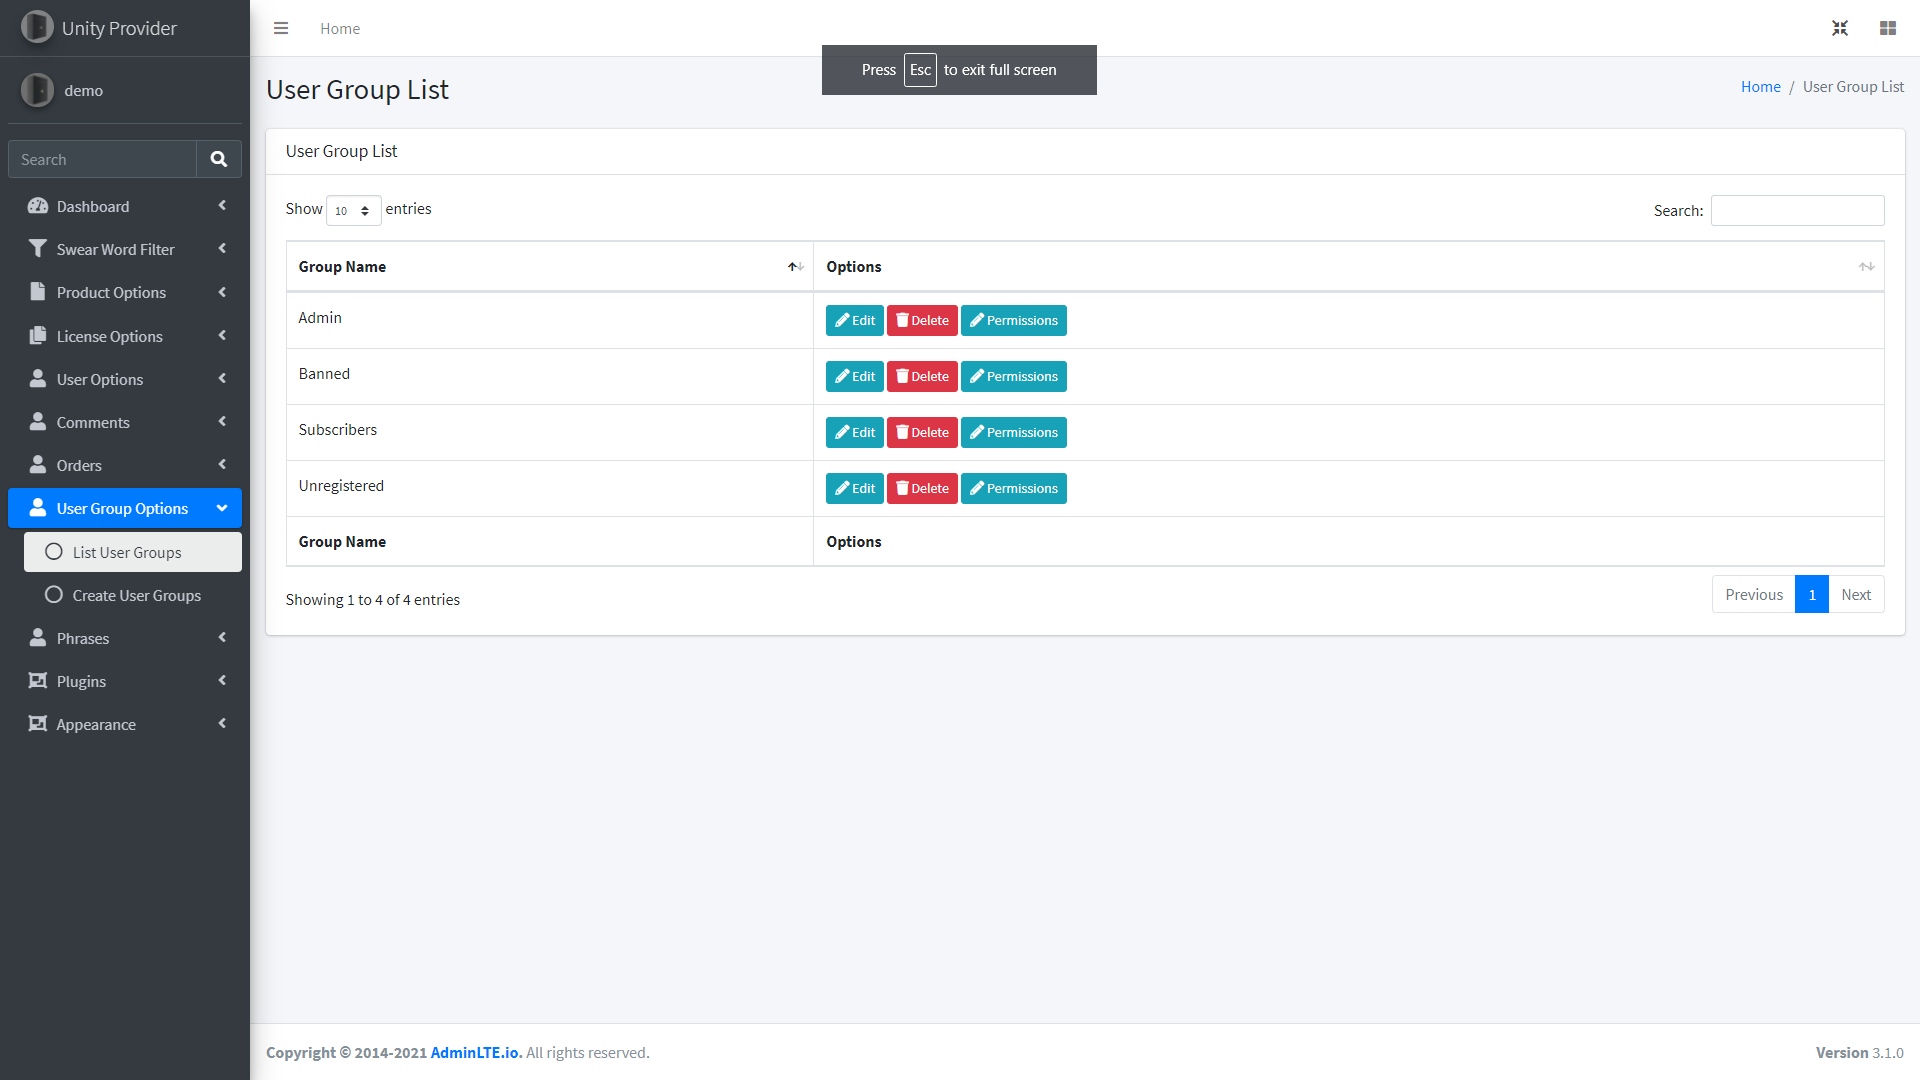
Adding and editing groups is simple see image here

When removing a group it will remove all permissions to this group as well.
User Group Permissions
Here we are going to show you the user group permissions, and what you can use them for.
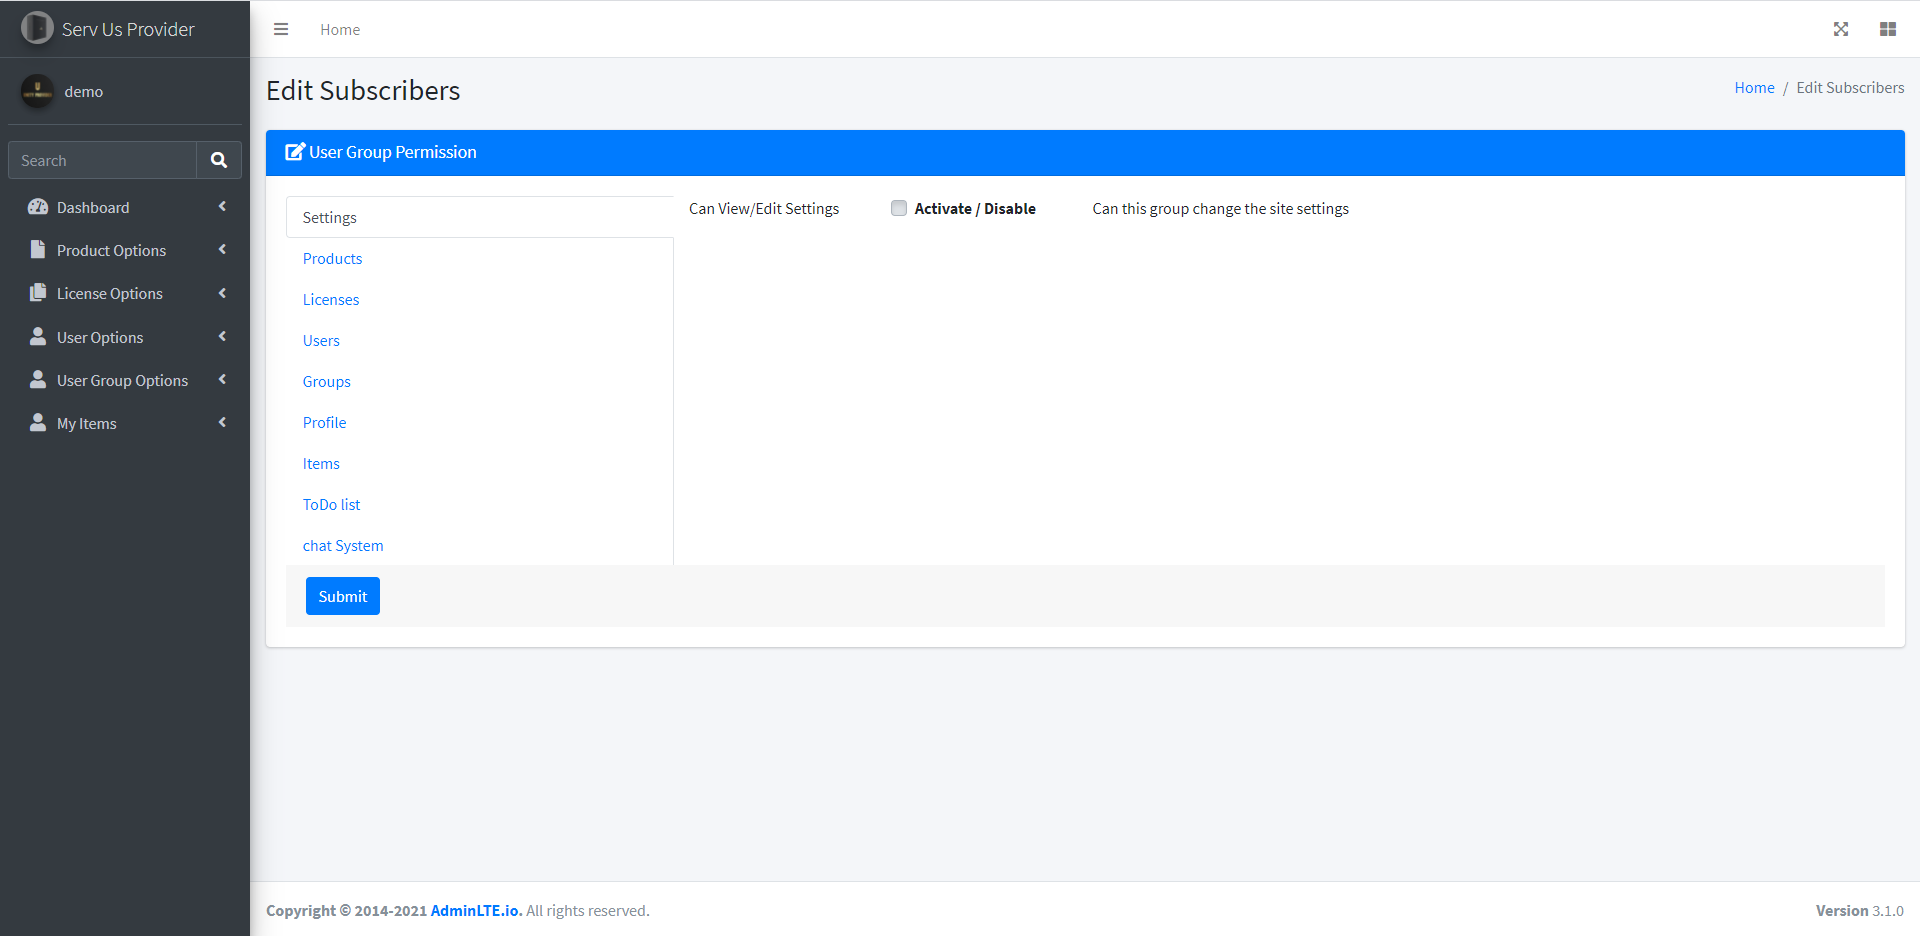
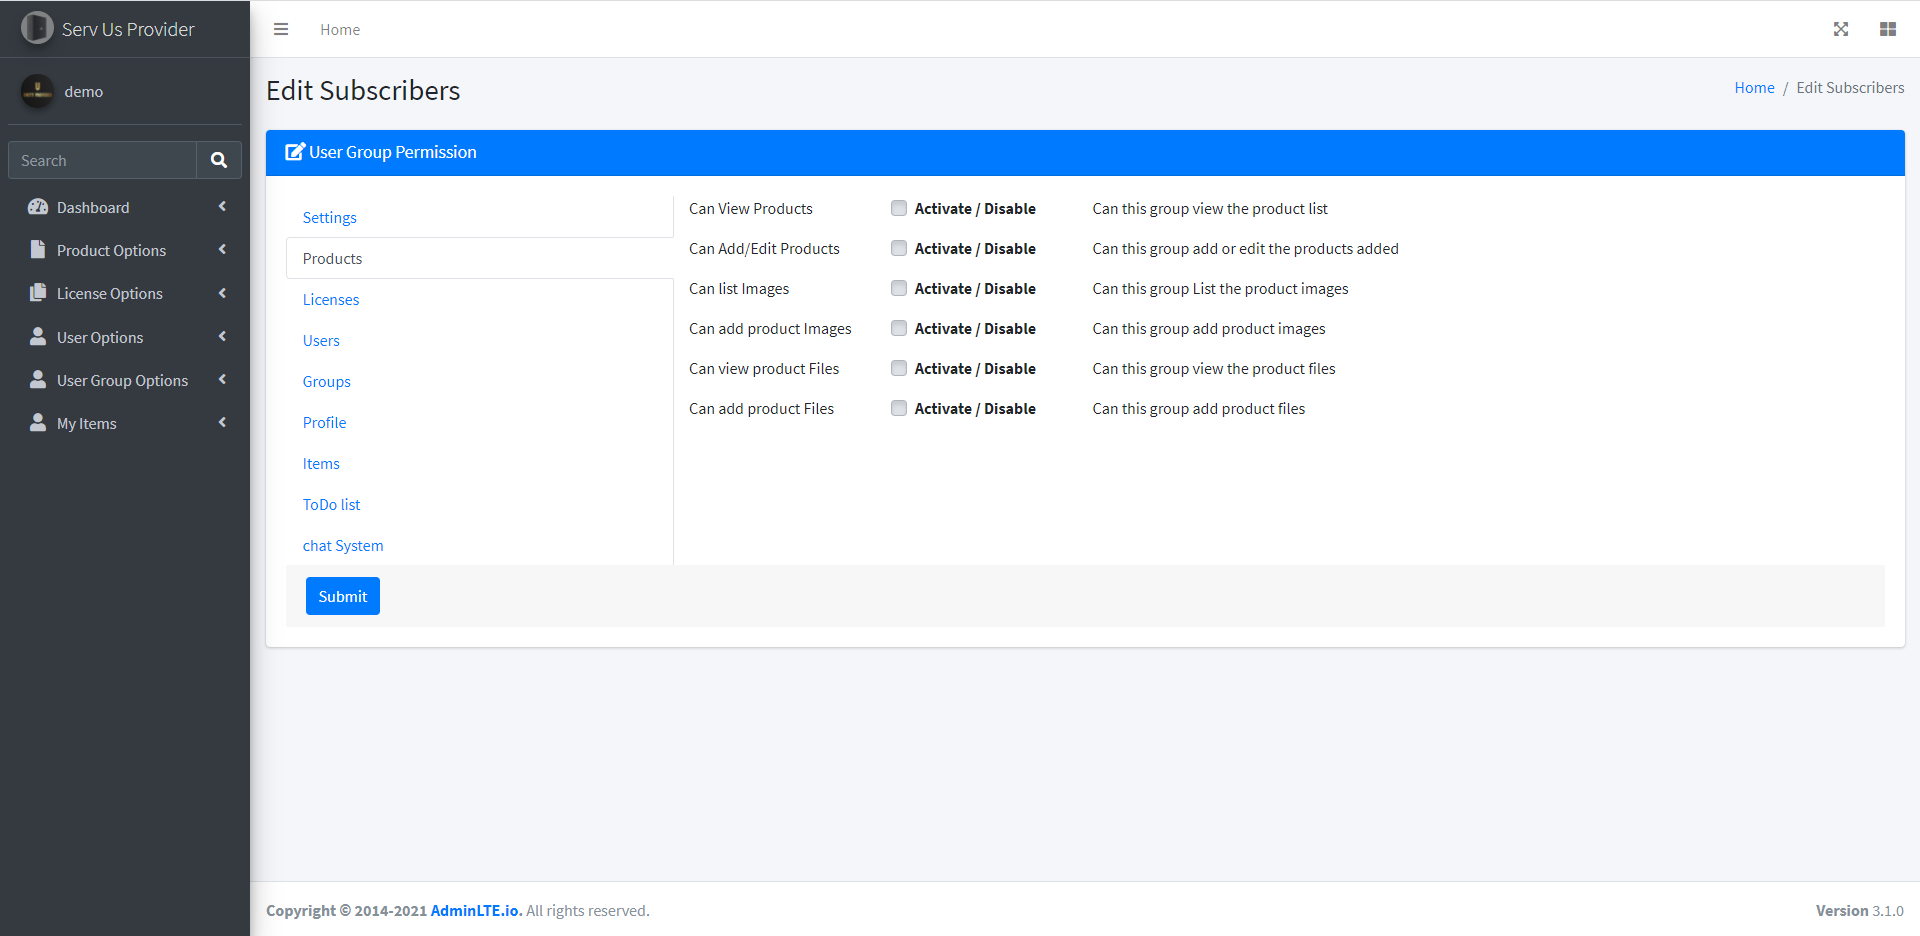
From the user groups permissions page you will see a menu to the left and the options to that menu shown to the right.
As you can see we have settings selected so this is showing the permissions to settings.
If i show you an image that has more options here
As you can see for the permissions to products there is a lot more options to choose from
If they are selected then this user group would be able to do the action that its selected.
You cannot add, edit or remove these options.
Phrases Manager
Phrase manager is where you can manage all the text in your site.

Select the View Phrases and this will show all the text thats added to the site here.
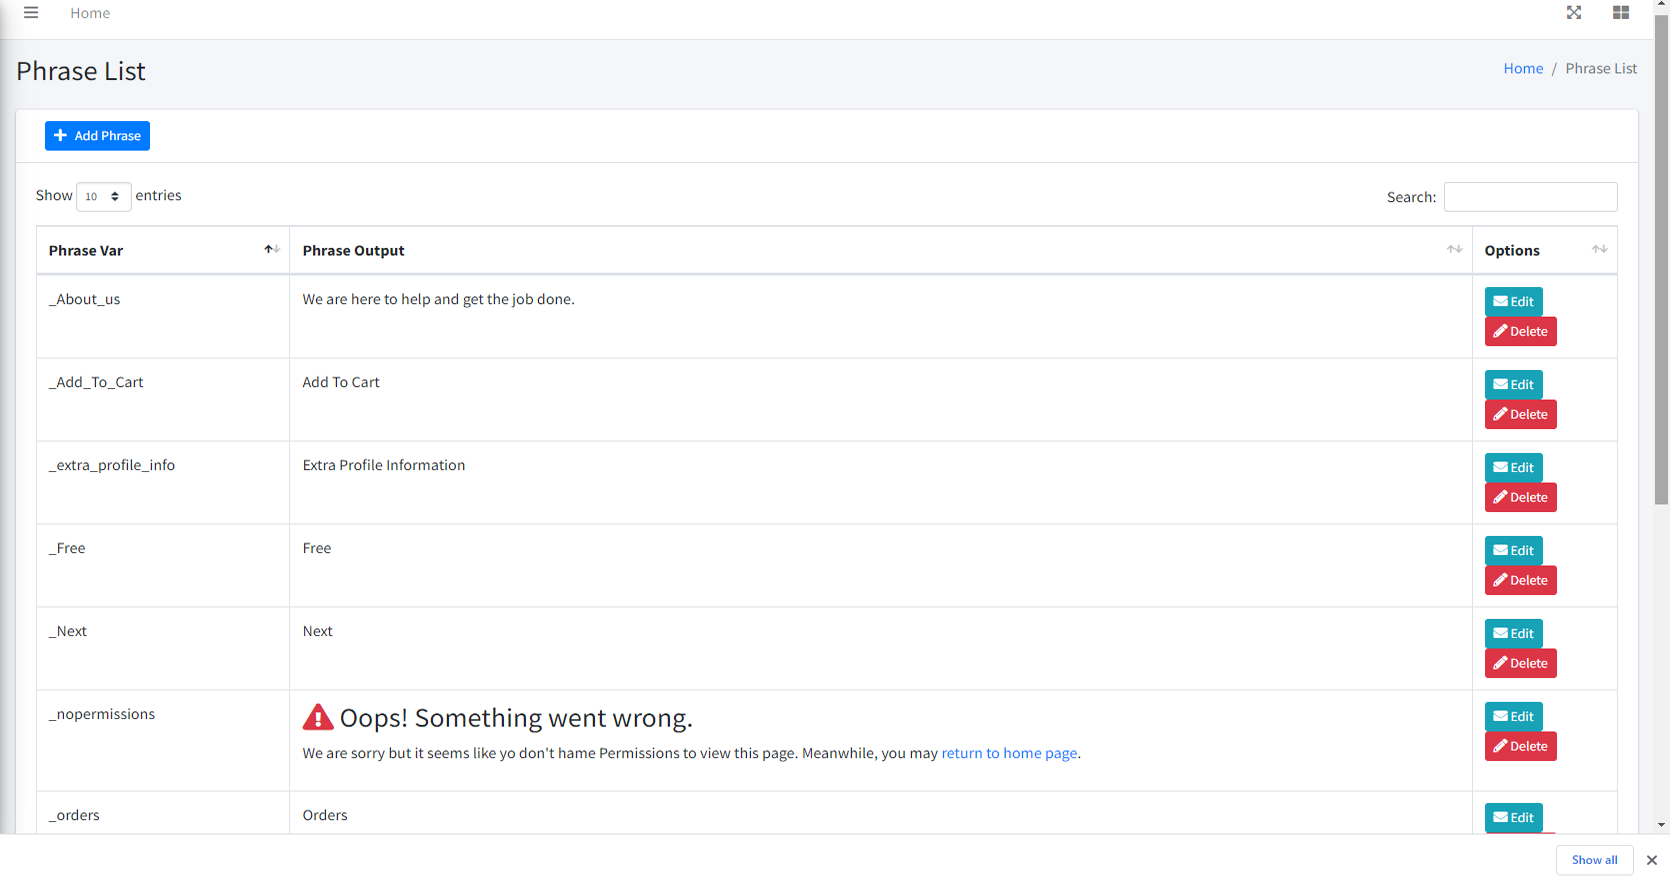
So if you want to change your text to another languish just edit the text and change to your needs.
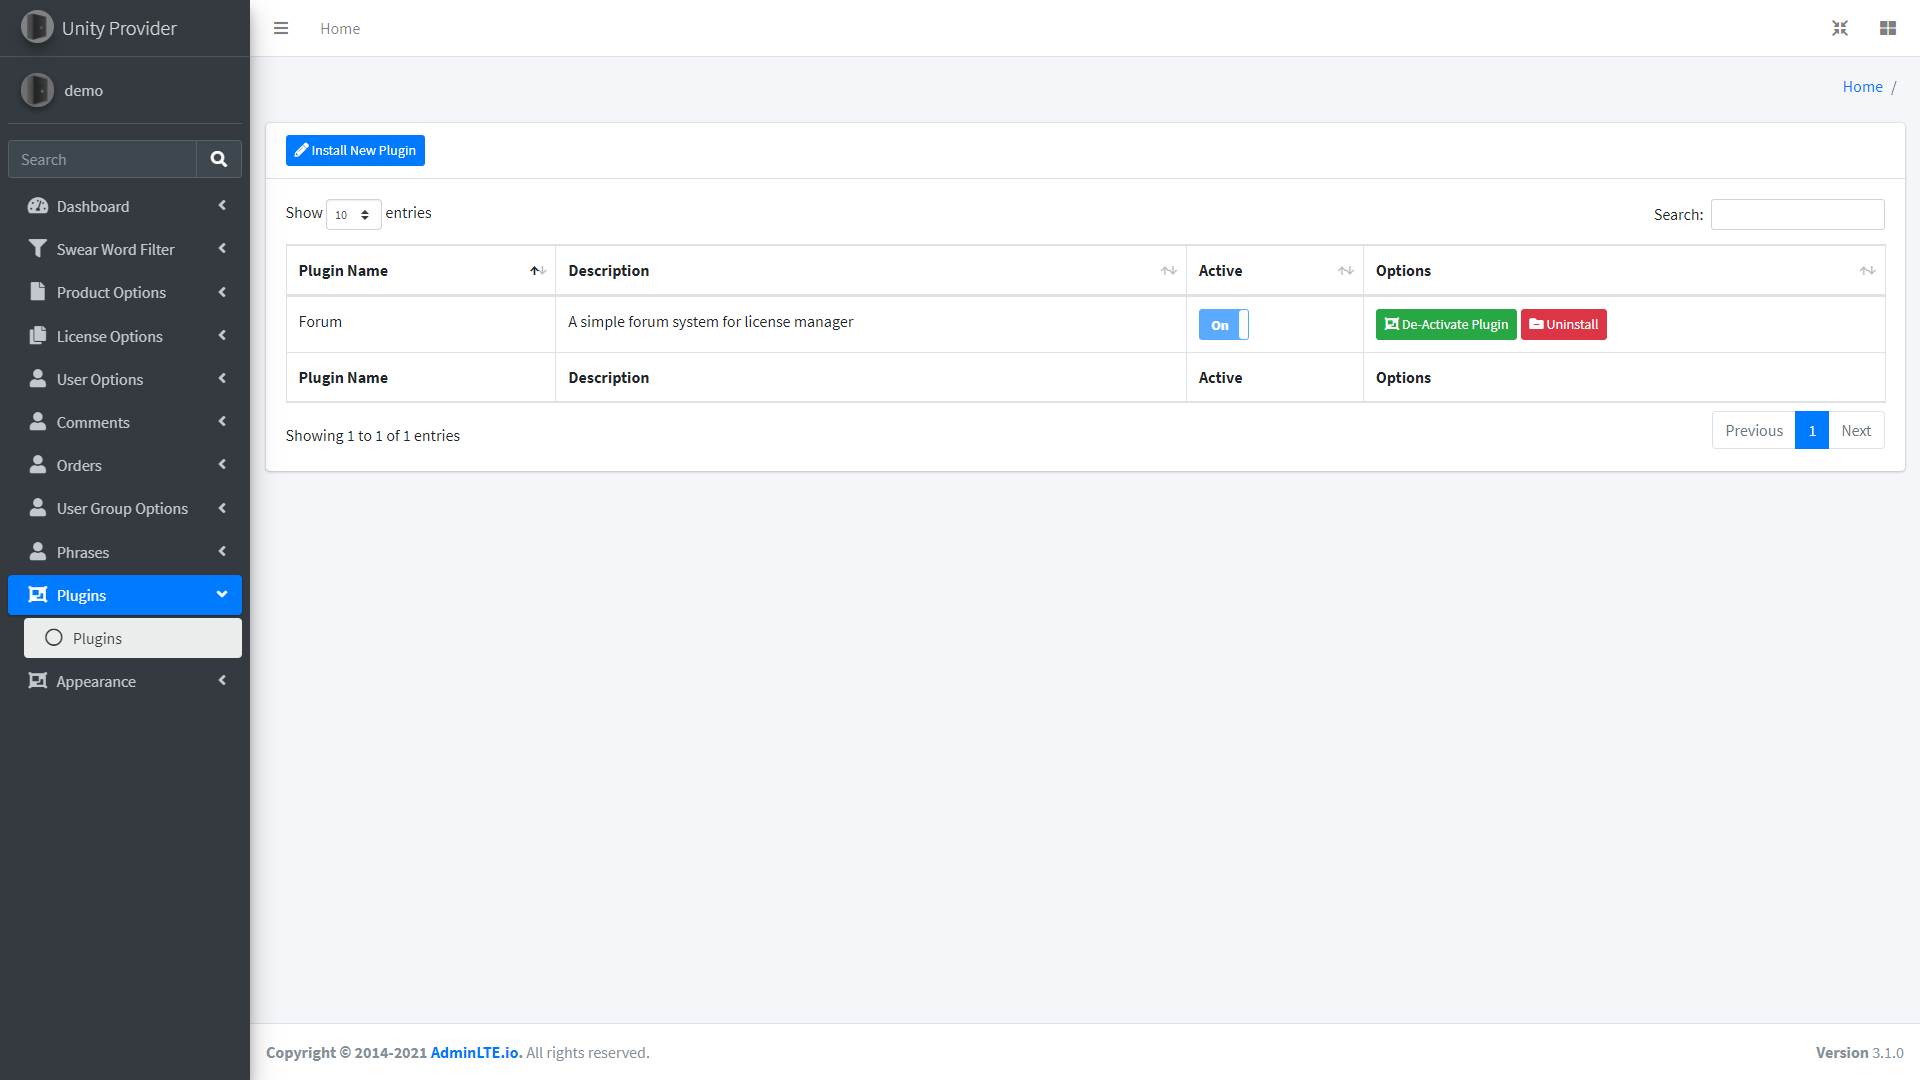
Plugin Manager
The plugins manager is just that you can buy extra addons to your site in the form of a plugin.
This could be a forum system to this documents system.
How to install these will be in the doc files for that plugin.
You can List, Activate, De-Activate or uninstall plugins.

Appearance Manager
This is where you can change the look of your site with a click of a button.
The default install of license manager has 3 styles for you to choose from Dark, Default and light blue
Buy new styles and upload to your site then install select active and you have a new look to your site.

Tools
These tools are here to help with backing up your sites database and much more.
Tools Available
<*>PHPInfo
<*>Database Backup
Newsletter
Just stay tune for our latest Product. Now you can subscribe